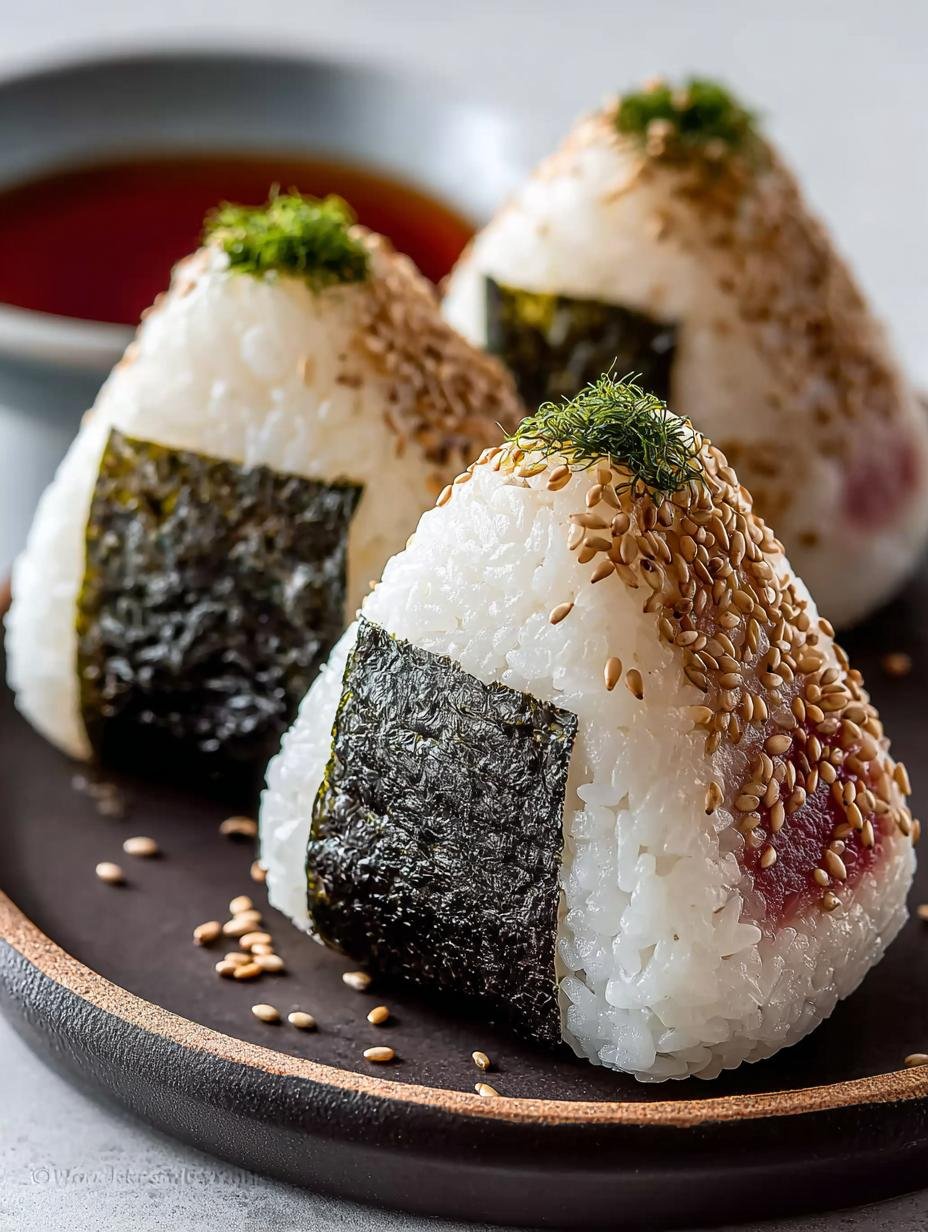
Authentic Japanese Tuna Onigiri is more than just a rice ball; it’s a comforting snack that combines convenience and rich flavors in every bite. When I take a bite of these delightful rice triangles, I’m transported to the lively streets of Japan, where they serve as perfect picnic companions or quick meals on the go. Easily made at home, these onigiri promise to be a family favorite, whether enjoyed warm or at room temperature.
Why You’ll Love This Authentic Japanese Tuna Onigiri
There are countless reasons to adore this dish. First, the Authentic Tuna Onigiri Recipe is incredibly simple, making it perfect for any skill level. Second, it’s a delightful blend of flavors; the umami-rich tuna filling pairs beautifully with the seasoned rice. Third, it’s a healthy option, as it’s gluten-free and offers protein and essential nutrients. Fourth, it’s versatile: you can customize it with different fillings. Fifth, it makes for a perfect lunchbox item, ideal for kids and adults alike. Lastly, it’s a great introduction to the world of Japanese cuisine, showcasing its cultural significance. Get ready to enjoy Japanese Tuna Rice Triangles that are not only delicious but also a fun way to explore authentic flavors!
Ingredients for Authentic Japanese Tuna Onigiri
Gather these items:
- 2 cups cooked short-grain rice
- ½ tsp salt
- 5.29 oz canned tuna (in oil or water), thoroughly drained
- 2 tbsp Japanese mayonnaise
- 2 sheets Nori (dried seaweed), cut into strips
- 1 tsp sesame seeds (optional, for garnishing)
How to Make Authentic Japanese Tuna Onigiri Step-by-Step
- Step 1: Season Rice: Transfer 2 cups warm, cooked short-grain rice to a large bowl. Sprinkle with ½ tsp salt. Gently fold the rice to combine without mashing. Allow to cool slightly until warm enough to handle comfortably.
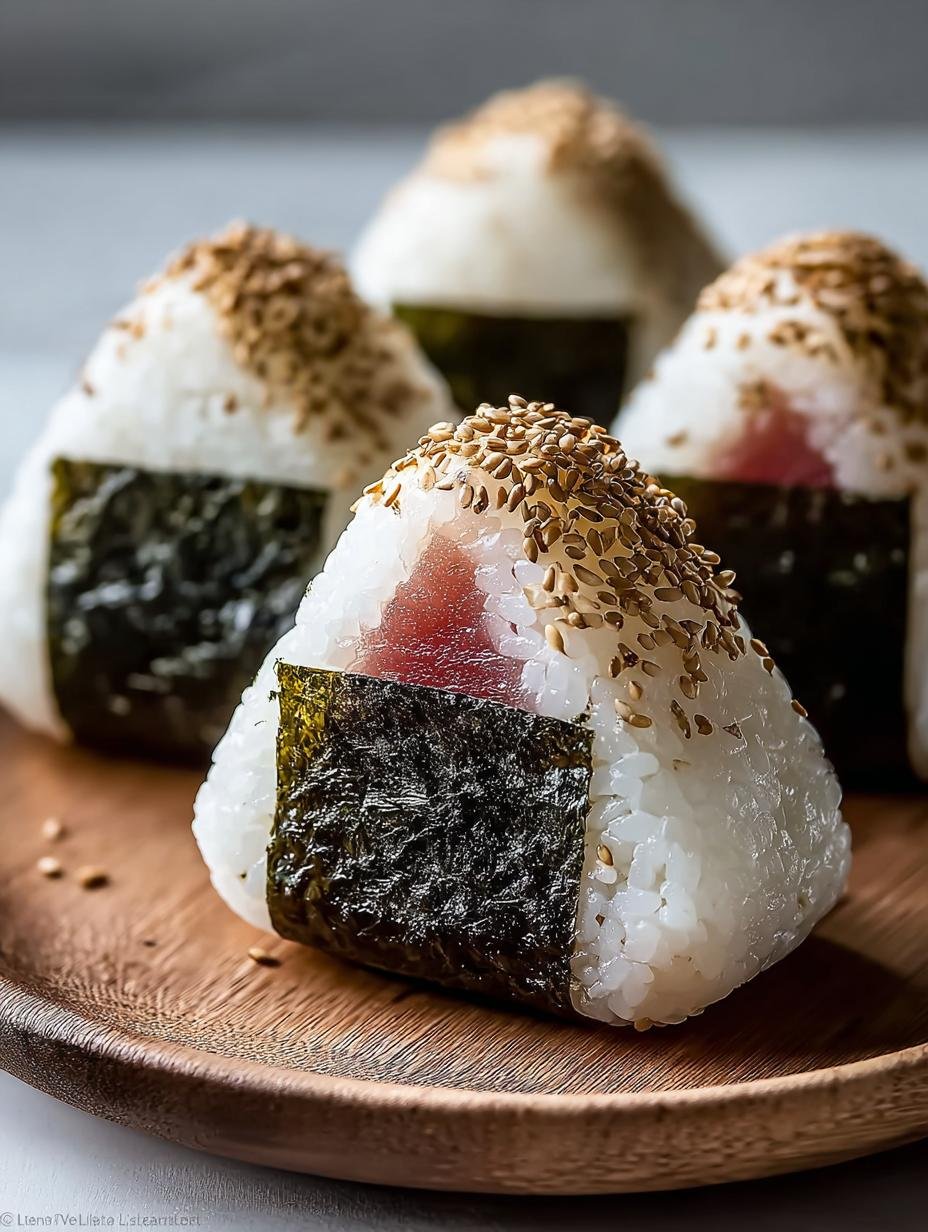
- Step 2: Prepare Tuna Filling: Thoroughly drain 5.29 oz canned tuna. In a medium mixing bowl, flake the tuna and mix with 2 tbsp Japanese mayonnaise until well combined and creamy.
- Step 3: Prepare for Shaping: Lightly dampen your hands with water and sprinkle a pinch of salt onto your palms, rubbing them together lightly. This prevents sticking and subtly seasons the onigiri’s exterior.
- Step 4: Form Onigiri: Take about ½ cup of the seasoned rice and cup it loosely in one palm. Use your thumb to create a shallow indentation in the center. Spoon 1 to 1½ tbsp of the tuna filling into the well. Cover the filling with another small amount of rice (about ¼ cup), pressing down lightly to seal it inside.
- Step 5: Shape Onigiri: Gently but firmly shape the rice into a compact triangle between your hands, rotating to create even sides and pointed corners. Alternatively, use plastic wrap around the rice for easier shaping and consistent results.
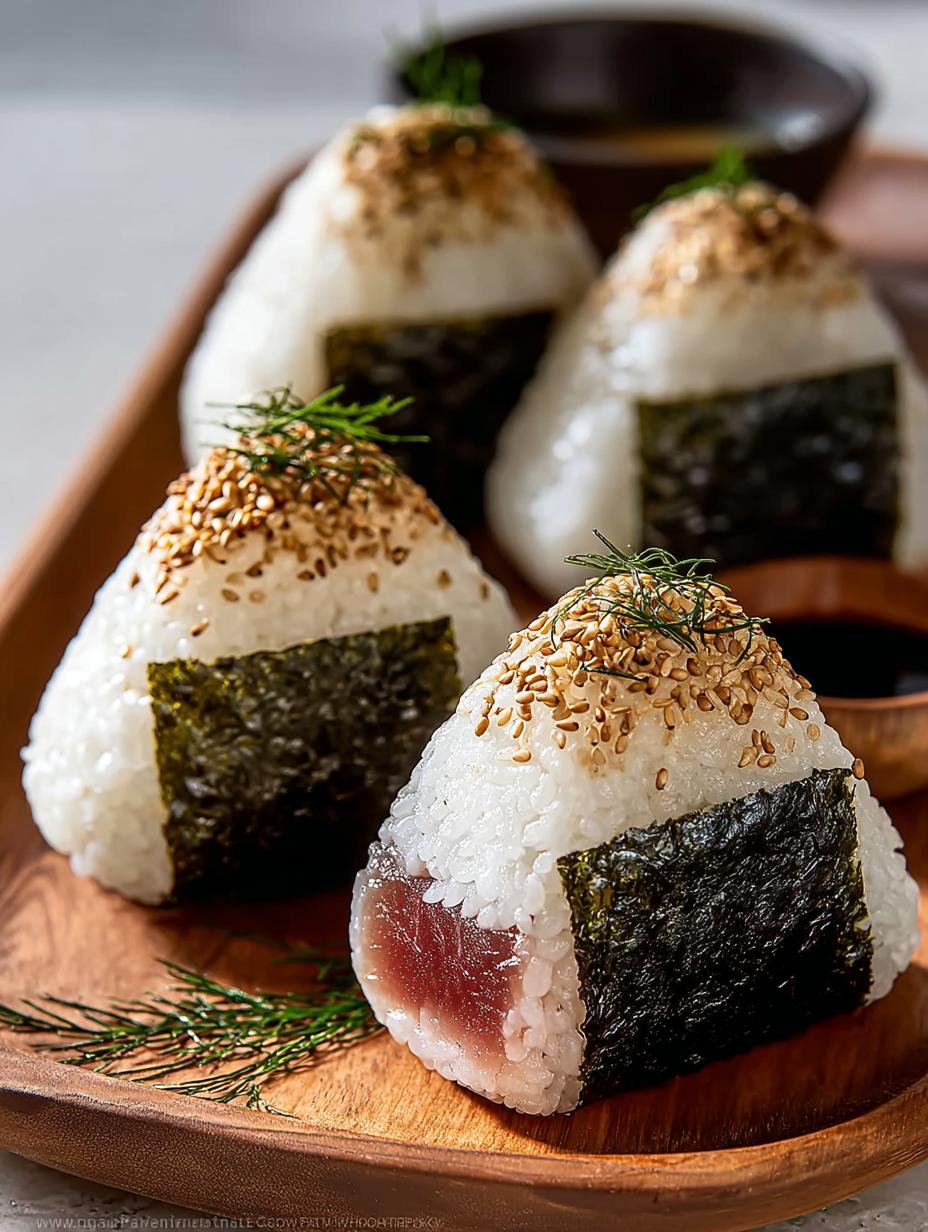
- Step 6: Add Nori & Garnish: Wrap a strip of nori around the base of each shaped onigiri. The rice’s moisture will help it adhere. Garnish with 1 tsp sesame seeds, if desired.
- Step 7: Serve & Store: Japanese Tuna Onigiri is best enjoyed warm or at room temperature. For storage, wrap each onigiri individually in plastic wrap (without nori). Refrigerate for up to a day, or freeze for longer storage. Always add fresh nori just before serving stored onigiri.
Pro Tips for the Best Authentic Japanese Tuna Onigiri
Keep these in mind:
- Use short-grain rice for the best texture.
- Adjust the amount of salt based on your taste.
- Fresh nori adds a nice crunch when serving.
- For a unique twist, try adding chopped vegetables or different fillings.
Best Ways to Serve Authentic Japanese Tuna Onigiri
There are delightful ways to enjoy your onigiri:
- Pair with miso soup for a comforting meal.
- Serve with pickled ginger and wasabi for an authentic touch.
- Make a bento box with seasonal fruits and other Japanese snacks.
How to Store and Reheat Authentic Japanese Tuna Onigiri
To keep your onigiri fresh, wrap each one individually in plastic wrap (without nori) and refrigerate. They can be stored for up to a day. If you want to make them ahead of time, consider freezing them and reheating just before serving. This method ensures they remain delicious and ready to eat!
Frequently Asked Questions About Authentic Japanese Tuna Onigiri
What’s the secret to perfect Authentic Japanese Tuna Onigiri?
The secret lies in using short-grain rice, which gives the onigiri the right texture. Additionally, ensuring your hands are damp while shaping helps prevent sticking, making it easier to form neat triangles.
Can I make Authentic Japanese Tuna Onigiri ahead of time?
Yes, you can prepare the rice and tuna filling in advance. Assemble the onigiri just before serving to ensure the rice stays fresh and the nori remains crispy.
How do I avoid common mistakes with Authentic Japanese Tuna Onigiri?
Avoid over-mixing the rice when seasoning, as this can make it mushy. Ensure your hands are moist but not wet when shaping to keep the rice from sticking too much.
Variations of Authentic Japanese Tuna Onigiri You Can Try
Here are a few variations to keep things exciting:
- Substitute the tuna with salmon for a different flavor.
- Add a touch of sriracha to the mayonnaise for a spicy kick.
- Incorporate avocado for a creamy texture and added health benefits.
Each variation maintains the essence of this Traditional Japanese Tuna Rice Balls dish while inviting new flavors!
For more delicious recipes, check out our Ciabatta Bread or Spaghetti with Garlic and Oil.
For more information on Japanese cuisine, you can visit Japan Travel for insights on traditional dishes.
Enjoy your cooking adventure with these authentic recipes and explore the flavors of Japan!
Print
Authentic Japanese Tuna Onigiri: 7 Steps to Deliciousness
- Total Time: 20 minutes
- Yield: 4 onigiri 1x
- Diet: Gluten Free
Description
Authentic Japanese Tuna Onigiri is a delicious rice snack that blends comfort and convenience in every bite.
Ingredients
- 2 cups cooked short-grain rice
- ½ tsp salt
- 5.29 oz canned tuna (in oil or water), thoroughly drained
- 2 tbsp Japanese mayonnaise
- 2 sheets Nori (dried seaweed), cut into strips
- 1 tsp sesame seeds (optional, for garnishing)
Instructions
- Season Rice: Transfer 2 cups warm, cooked short-grain rice to a large bowl. Sprinkle with ½ tsp salt. Gently fold the rice to combine without mashing. Allow to cool slightly until warm enough to handle comfortably.
- Prepare Tuna Filling: Thoroughly drain 5.29 oz canned tuna. In a medium mixing bowl, flake the tuna and mix with 2 tbsp Japanese mayonnaise until well combined and creamy.
- Prepare for Shaping: Lightly dampen your hands with water and sprinkle a pinch of salt onto your palms, rubbing them together lightly. This prevents sticking and subtly seasons the onigiri’s exterior.
- Form Onigiri: Take about ½ cup of the seasoned rice and cup it loosely in one palm. Use your thumb to create a shallow indentation in the center. Spoon 1 to 1½ tbsp of the tuna filling into the well. Cover the filling with another small amount of rice (about ¼ cup), pressing down lightly to seal it inside.
- Shape Onigiri: Gently but firmly shape the rice into a compact triangle between your hands, rotating to create even sides and pointed corners. Alternatively, use plastic wrap around the rice for easier shaping and consistent results.
- Add Nori & Garnish: Wrap a strip of nori around the base of each shaped onigiri. The rice’s moisture will help it adhere. Garnish with 1 tsp sesame seeds, if desired.
- Serve & Store: Japanese Tuna Onigiri is best enjoyed warm or at room temperature. For storage, wrap each onigiri individually in plastic wrap (without nori). Refrigerate for up to a day, or freeze for longer storage. Always add fresh nori just before serving stored onigiri.
Notes
- Use short-grain rice for the best texture.
- Adjust the amount of salt based on your taste.
- Fresh nori adds a nice crunch when serving.
- Prep Time: 10 minutes
- Cook Time: 10 minutes
- Category: Snack
- Method: No-cook
- Cuisine: Japanese
Nutrition
- Serving Size: 1 onigiri
- Calories: 180
- Sugar: 1g
- Sodium: 300mg
- Fat: 7g
- Saturated Fat: 1g
- Unsaturated Fat: 5g
- Trans Fat: 0g
- Carbohydrates: 24g
- Fiber: 1g
- Protein: 7g
- Cholesterol: 20mg


Leave a Reply